

At-Home IPL vs. Professional Laser: Making Sense of Your Options
Bold statement: nearly 60% of people try DIY hair removal before visiting a clinic. You want smooth, long-lasting hair reduction, and both at-home IPL and professional laser aim for the same thing: fewer hairs, slower regrowth. Cost, convenience, and results vary — this guide breaks down how each method works, what results to expect, safety tips, real-world comfort, and a checklist to help you choose.
You’ll get simple explanations of the science, a cost comparison (upfront and hidden fees), safety advice (how to minimize burns and which post-care ingredients like aloe vera, niacinamide, and sunscreen to use), and a step-by-step decision checklist. This is informational, beginner-friendly, and not medical advice.

At-Home IPL vs. Professional Laser: Pros
How At-Home IPL and Professional Laser Actually Work (The Basics, in Plain Language)The simple difference
You don’t need a medical degree to get this: at-home IPL uses broad-spectrum flashes of light (lots of wavelengths at once), while professional laser hair removal uses a single, focused wavelength aimed precisely at hair pigment. Both target melanin in the hair follicle to slow regrowth, but the tools and power levels differ — and that affects at-home IPL effectiveness versus professional laser hair removal results.
How hair color and skin tone matter
- Darker hair (more melanin) absorbs light better — easier to treat.
- Very light, red, or grey hair has less melanin and responds poorly to light-based methods.
- Lighter skin gives a clearer contrast for most devices; darker skin may require longer wavelengths (e.g., Nd:YAG 1064 nm used in clinics) to reduce risk.
What a typical session feels like
A session usually feels like a quick warm “snap” or rubber-band sting. Professional lasers deliver stronger pulses and often include faster cooling. At-home IPL is milder but requires many more sessions. Expect less discomfort in both when a cooling tip or gel is used.
Common device components
- Flash lamp or laser diode (light source)
- Skin tone sensor and safety cutoffs
- Cooling tip or fan
- Adjustable energy/“joule” settings
- Treatment window size (bigger in clinics for faster coverage)
Practical example: consumer vs clinic
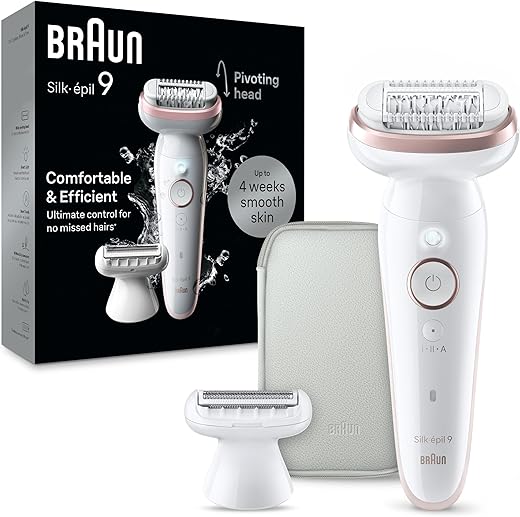
- At-home IPL: Philips Lumea Prestige, Braun Silk·expert Pro, and Tria Hair Removal Laser 4X (Tria is a consumer diode laser) — compact, lower fluence, good for maintenance.
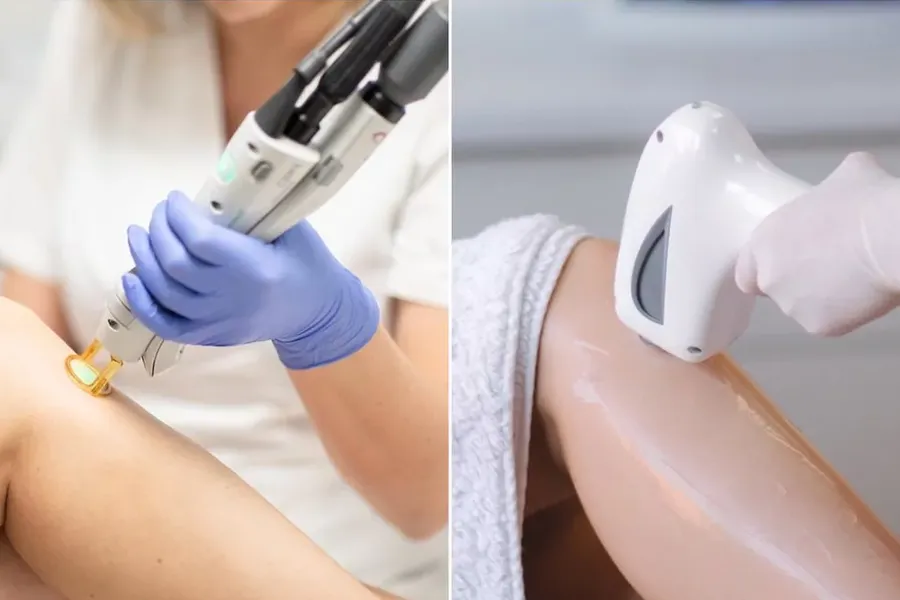
- In-office: Candela GentleMax Pro (alexandrite/ND:YAG combo), Lumenis LightSheer (diode) — higher fluence, better for dense or coarse hair and darker skin types.
Quick how-to tips
- Shave clean, do a patch test, start on the lowest setting, and avoid tanning before and after treatment.
- Post-care ingredients to soothe skin: aloe vera, niacinamide, and broad-spectrum sunscreen.
Typical results and how many sessions
- At-home IPL (Philips Lumea Prestige, Braun Silk·expert Pro, Tria Hair Removal Laser 4X): many users report noticeable reduction after 6–12 sessions, with continued improvement over several months. Typical reported reduction ranges from around 30–60%, depending on device and user.
- Professional laser (Candela GentleMax Pro, Lumenis LightSheer): clinics often deliver faster, larger reductions—commonly reported in the 60–90% range after a full series of 4–8 sessions spaced 4–8 weeks apart.
Real-world examples
- Fair skin + dark hair: usually the easiest combination. You’ll likely see visible reduction faster with either option, and at-home devices can work well for maintenance.
- Darker skin tones: professional lasers using longer wavelengths (Nd:YAG 1064 nm) are safer and more effective; at-home IPL is riskier and may be less effective.
- Light blond, red, or grey hair: these hair colors have less melanin, so both at-home IPL and many lasers may struggle—expect limited results, and discuss alternatives with a pro.
Timeline: initial reduction vs maintenance
Expect initial clumping of results (big drop after several sessions), then slower gains. After the initial series, maintenance sessions are common: at-home devices monthly or every few months; clinics often schedule touch-ups every 6–12 months.
Why outcomes vary
Device power (fluence), pulse duration, treatment window size, your technique (shave first, consistent overlap), hair growth cycle timing, and natural hair thickness all change results.
Safety & tracking tips
- Always do a patch test on each device setting.
- Photograph the area under consistent lighting every 2–4 weeks to track progress.
- Soothe skin with aloe vera or niacinamide after treatment and use broad-spectrum sunscreen on treated areas.
Next up: we’ll break down the real costs — upfront, long-term, and the hidden expenses that change what’s “worth it.”
Cost Breakdown: Upfront Price, Long-Term Value, and Hidden ExpensesYou need to know how the dollars add up. Below is a clear, practical breakdown so you can compare the real cost of at-home IPL vs. professional laser.
Upfront and typical package pricing
- At-home IPL / laser device: $200–$700 (examples: Philips Lumea Prestige ~$350–500, Braun Silk·expert Pro ~$200–350, Tria 4X ~$400–500). These are one-time buys with built-in pulse lifespans.
- Professional clinic: per-session fees vary by area treated—small area (upper lip, underarm) $75–$200; larger area (legs, back) $200–$700. Full series often recommended: 4–8 sessions, so total $300–$3,500 depending on area and device (Candela GentleMax Pro, Lumenis LightSheer).
Hidden and recurring costs
- Replacement cartridges / bulbs: some home devices require cartridges or have finite pulses; replacements can be $30–$150.
- Protective eyewear: clinics usually supply goggles; if you buy home goggles, expect $10–$50.
- Pre/post-care products: fragrance-free moisturizer, aloe vera gel, niacinamide serum, broad-spectrum sunscreen (look for zinc oxide or avobenzone): $10–$50 per treatment cycle.
- Downtime or missed-work costs: minor for most people, but factor in if a session causes visible redness or blistering (possible costs: $0–$200 for special care or time off).
- Travel, parking, tip for technicians, and consult fees.
Two practical scenarios
- Budget-minded DIY: buy a $350 IPL device, $30 sunscreen/soothing gel over a year, no cartridges = ~ $380 first year. If you plan maintenance for multiple years and many small areas, cost per year drops.
- Speed-focused pro route: 6 clinic sessions for legs at $300 each = $1,800 total; maintenance 1–2 sessions/year thereafter.
Quick ROI method
- Estimate total at-home cost = device + expected replacement parts + 1 year of care products.
- Estimate total pro cost = session price × number of sessions + maintenance.
- Divide each total by years of benefit you expect to get. Lower cost/year is more cost-effective for you.
Tip: look for multi-area packages, seasonal promos, membership pricing, and clinic financing (CareCredit or payment plans) to reduce out-of-pocket impact. Next up: how safety and side effects compare — so you can weigh cost against risk.
Safety and Side Effects: How to Minimize Risk at Home and in the ClinicCommon, usually temporary side effects
Most people only get mild reactions that fade in days. Watch for:
- Temporary redness and mild swelling
- Tingling or heat during treatment
- Short-term pigment changes (lightening or darkening)
- Rare blistering or scabbing if settings are too high
How to minimize risk at home
Follow device instructions exactly, don’t shortcut cooling times, and start on the lowest effective setting. Key practical steps:
- Always perform a patch test: shave a small area, wait 24–48 hours, then run one treatment on a 1-inch square. Watch for abnormal redness, blistering, or itching for 72 hours.
- Avoid tanning and strong sun exposure 2–4 weeks before and after treatments; sunscreen (SPF 30+) is non-negotiable.
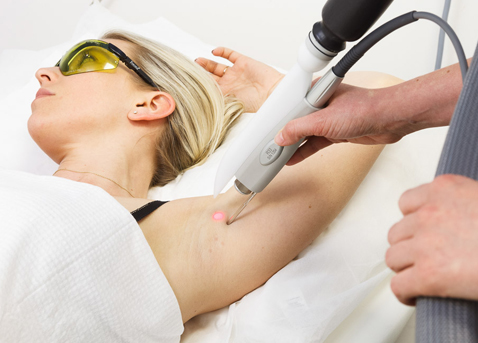
- Use protective eyewear during treatments—your eyes matter.
- Consider gentle pre/post-care ingredients: Aloe barbadensis extract (aloe vera) for cooling; hyaluronic acid for hydration; glycerin and panthenol (pro-vitamin B5) to support the skin barrier; witch hazel as a mild astringent.
- If you use topical numbing, common ingredients include lidocaine-containing creams. This is informational only — follow product directions and talk to a clinician if unsure.
What to tell your clinician at a consultation
Be transparent—this helps them pick settings and avoid complications:
- Recent sun exposure or tanning
- Medications (especially photosensitizing drugs or isotretinoin in the past 6–12 months)
- History of hyperpigmentation, keloids, or cold sores
- Pregnancy or breastfeeding status
When to pause and seek professional help
Stop treatments and contact a provider if you see:
- Large blisters, increasing pain, spreading redness, or pus
- New, persistent dark or light patches lasting weeks
- Any systemic symptoms like fever
Next up: real-world comfort and convenience—what treatments actually feel like and how they fit into your life.

Time per session and total time to results
At-home IPL or diode devices often require more frequent, longer sessions — expect 15–60 minutes depending on the area (face vs. legs). Professional clinic visits are usually quicker per session (15–30 minutes for many areas) because machines cover larger areas faster. Clinicians may get you to your desired reduction in fewer sessions, but you’ll need to schedule and travel for appointments.
Setup, privacy, and travel
At-home wins for privacy and flexibility — you can treat in pajamas between video calls. Typical devices to compare:
- At-home IPL: Philips Lumea Prestige, Braun Silk·expert Pro 5
- At-home laser: Tria Hair Removal Laser 4X
- Clinic lasers: Candela GentleMax Pro, Lumenis LightSheer
If you work long hours or rely on childcare, clinic visits mean coordinating time off and travel; at-home lets you spread short treatments across evenings.
Typical sensations and making it comfortable
Most people describe warmth, pinpricks, or a rubber-band snap. To reduce discomfort:
- Use a simple cooling gel with aloe (Aloe barbadensis extract) and glycerin applied before/after.
- Use ice packs or a chilled gel pack wrapped in cloth for 10–15 seconds before and after.
- Time sessions when you’re rested; avoid caffeine beforehand.
- For pain management, consider over-the-counter analgesics (ibuprofen or acetaminophen) only as directed.
Real-world scenarios
- Busy professional: Prefers clinic if they can book lunchtime appointments for faster progress; otherwise a compact at-home device (Braun or Tria) for short evening sessions.
- Parent with limited childcare: At-home IPL you can pause between kids’ activities; break up smaller areas over several days.
- Budget-conscious student: At-home device amortizes over months; expect slower results but far lower per-session cost.
Next, we’ll walk through a step-by-step checklist to help you choose the right option based on your skin, budget, and goals.
How to Decide: A Step-by-Step Checklist Based on Your Skin, Budget, and GoalsStill undecided? Use this hands-on framework to choose confidently.
Quick checklist: answer these first
- What’s your skin tone (Fitzpatrick I–VI)?
- What’s your hair color and thickness (dark, light, red/blond/gray)?
- What areas do you want treated (face, bikini, legs)?
- How much can you spend now vs. annually?
- How much time/appointments can you commit?
- What’s your pain tolerance?
- Any history of sensitivity, keloids, active skin conditions, or recent tanning?
Recommendations by common profiles
- Light skin + dark hair + want fast, long-term reduction: consider professional diode/Alexandrite laser (fewer, stronger sessions).
- Light skin + limited budget + ok with regular at-home upkeep: quality IPL (Philips Lumea Prestige) or at-home laser (Tria 4X) can work.
- Medium–dark skin: prioritize Nd:YAG lasers at a reputable clinic—professional settings are safer.
- Blonde/gray/red hair: both home IPL and many lasers may be less effective; consult a pro about alternatives.
- Very sensitive skin or active acne: patch test first and favor conservative clinic protocols.
Simple cost + timeline template (plug in your numbers)
- Clinic: typical schedule = every 4–8 weeks × 6–8 sessions. Total cost = per-session price × sessions (e.g., $250 × 6 = $1,500).
- At-home: device cost $300–$600 + occasional replacement cartridges. Sessions every 1–2 weeks for 3–6 months, then maintenance. Break-even check: device price vs. cumulative clinic visits.
What to look for in devices & clinics
- Home devices: FDA-cleared for hair removal, clear instructions, safety sensor.
- Clinics: board-certified dermatologist/plastic surgeon or certified laser technician, transparent pricing, pre-treatment consultation and patch test, before/after photos.
Aftercare ingredients & routines
- Cleanse gently (mild surfactants like cocamidopropyl betaine).
- Soothe with niacinamide + vitamin E serums and aloe/glycerin cooling gels.
- Use broad-spectrum SPF 30+ daily.
- Avoid retinoids/exfoliants 48–72 hours post-treatment and skip direct sun.
Final safety reminders: prioritize skin health, stop if you see severe irritation, and consult a professional for complex conditions or uncertain matches. Next, the Conclusion will help you make the final call and outline your next steps.
Making Your Choice and Next Steps
You’ve weighed the trade-offs: at-home IPL is cheaper and convenient; professional laser is faster and overseen by a clinician. For safety and best results, prioritize your skin tone, hair color, and any conditions. Try a patch test with your device or product (include cooling gel with aloe vera and a broad-spectrum sunscreen containing zinc oxide or avobenzone). Track reactions for 48–72.
Next steps you can take today: list three clinics and compare prices, technologies, and reviews; create a simple cost spreadsheet showing upfront fees, maintenance sessions, and expected replacements; perform a small at-home patch test per manufacturer instructions; and book a consultation if you have scars, active acne, or medications. If in doubt, consult a licensed provider before starting. Your comfort and safety come first—choose the path that fits your goals and lifestyle today.


Quick question: for maintenance after professional laser, is it worth keeping an at-home IPL (like the INNZA) for touch-ups? Or does that mess up the clinic results?
Good question. Many people use at-home IPL as maintenance after a professional course; it won’t ‘mess up’ the clinic results if you follow timing and patch-test. Discuss with your laser tech so they can advise on timing and skin compatibility.
Thanks! Will ask my tech — makes sense.
I do maintenance with an at-home IPL and it kept hairs from rebounding. Just be cautious about overlapping too soon after clinic treatment.
Some constructive feedback: loved the detail but wish there were more before/after timelines — like exact weeks to expect 25%, 50% reduction. Maybe add a sidebar with typical timelines by hair type?
Appreciate the reply! Even anecdotal case ranges would help.
+1 for timelines. I stopped too early once because I thought it wasn’t working, but if I knew 8–12 weeks is normal I’d’ve kept going.
Thanks, Olivia — that’s great feedback. We tried to keep timelines general because results vary, but adding a sidebar with typical case studies is a solid idea; I’ll pass it to the editor.
I appreciated the ‘How to Decide’ checklist. Made it simple: skin tone, hair color, budget, commitment. Helped me choose a clinic for facial laser instead of a home IPL device.
Glad the checklist helped, Isabella. It’s meant to simplify choices — sounds like it worked for you.
I used that checklist too and ended up hybrid: started at home for body and did clinic for face.
I found the ‘Effectiveness’ section realistic. However, would love a short FAQ about hormones affecting regrowth (PCOS etc.). That can change expectations a lot.
Excellent idea, Olga. Hormonal causes like PCOS can indeed affect regrowth and treatment outcomes; we’ll add an FAQ to cover that nuance.
Thanks — glad it’s on the radar!
Agreed — my regrowth was much worse until I got my hormones checked.
Loved the product list — seeing the FreeMascot glasses called out made me buy them. Heads up: measure fit if you wear glasses, they can be bulky but still functional.
I wear regular glasses and the FreeMascot fit over mine fine. Slight fogging sometimes though.
Thanks for the tip, Anthony. Fit can be an issue — some models are bulkier than others, so trying them on if possible is wise.
I have dark skin and wanted to point out: many at-home IPL devices (not all) are not recommended for darker Fitzpatrick types. The article mentions it but please be explicit next time — it’s a safety issue.
You’re absolutely right, Natalie. We do note the limitation, but we can make the warning more prominent in future updates — thanks for calling that out.
Appreciate you saying this. I almost bought an at-home unit before realizing it wasn’t safe for my skin tone.
Cost section was my favorite. The long-term math convinced me to try professional laser once instead of buying a home device. Clinic offered a package that, when amortized, was cheaper for my stubborn chin hairs.
Same here. I did a quick spreadsheet after reading and the clinic package won for me too.
That’s a smart approach, Raj — comparing per-session cost and expected number of treatments usually reveals the real value. Glad the article helped with the math.
Anyone worried about eye safety? Article mentioned FreeMascot Broad-Spectrum Laser Safety Glasses Green — are those legit for home IPL? Kinda worried about cheap knockoffs online.
Good question. The FreeMascot glasses listed are broad-spectrum and can offer protection for many wavelengths, but make sure the specs match your device’s output. At-home IPL devices often come with basic goggles; adding certified glasses is a good extra layer.
I bought the FreeMascot ones — they feel solid. Don’t rely on sunglasses, these are different. Worth the small extra expense imo.
Thanks, Nora. I’ll check the specs and buy the FreeMascot pair if they match my device wavelength.
Minor nitpick: a few clinical cost examples were US-centric. International readers might see different pricing. Maybe add a small note about geographic variability?
Good suggestion, Ethan. We mention cost variability, but adding explicit international examples would improve the piece. I’ll flag this to the team.
Cool, glad someone else noticed. Not a big deal, but helpful for global readers.
Yes please — I’m in India and prices are quite different, clinics and home devices vary widely here.
Great breakdown — I actually bought the INNZA IPL Hair Remover with Ice Cooling after reading this. Quick note: I saw noticeable reduction after 4 sessions, but the instructions about skin tone were a little confusing. Anyone else with pale skin use it?
I had the opposite: fair skin but very fine blond hair, so IPL barely worked for me. Might be the hair pigment more than skin tone.
Thanks for sharing, Emily — glad it helped. The article points out that at-home IPL works best on lighter skin with darker hair; if you’re very pale it should be okay but always do a patch test first and follow the skin-tone chart in the INNZA manual.
I have pale skin and used INNZA too — did patch test on my inner arm first. No burns, just mild redness for a day. Results slowly improved over 2 months.
Personal story: bought an at-home IPL for my legs (INNZA) and it did reduce regrowth, but didn’t fully eliminate. For bikini line I went to clinic. Best combo for me was both — saves money and time.
Exactly. Balance is key.
Same combo here. Home for large areas, clinic for sensitive zones.
Thanks for sharing, Camille — that hybrid approach is common and often cost-effective.
Neutral take: article was balanced but I felt it leaned slightly toward salons being better value for stubborn hair. I think it depends a lot on personal discipline and hair type. No one-size-fits-all here.
Fair point, David. We aimed for balance, but readers with stubborn hair often see better returns with clinical lasers — still, individual factors matter.
Agree — my coarse dark hair needed clinic sessions. Others get great results at home, so it’s personal.